
Once Again im pinching information from Douglas in Scotland , This time its tips on fitting My sails to sea Kayaks, there are newer instructions being peppered , I now supply deck buttons i the kits , there mentioned in an earlier post , and the mast all have the new base arrangement , also mentioned in an earlier post . One thing to remember is that there’s no hard or fast rools when fitting a sail to a sea kayak, the things I consider are ; its got to be deployed and stowed in a mater of seconds, not detract from the original function of the boat when stowed , I have a sea kayak that can be sailed , not a sail boat that can be paddled !
WEDNESDAY, JULY 14, 2010
Flat Earth Kayak Sails fitting instructions
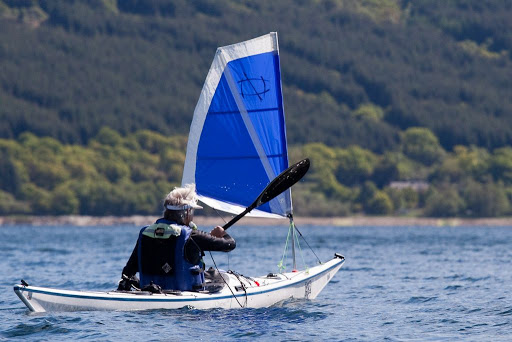
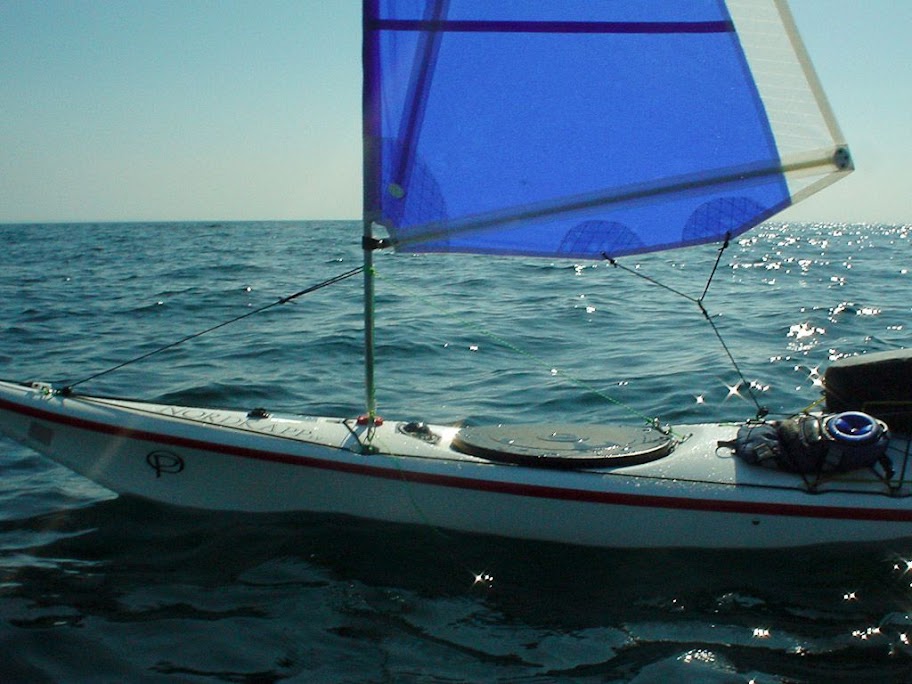
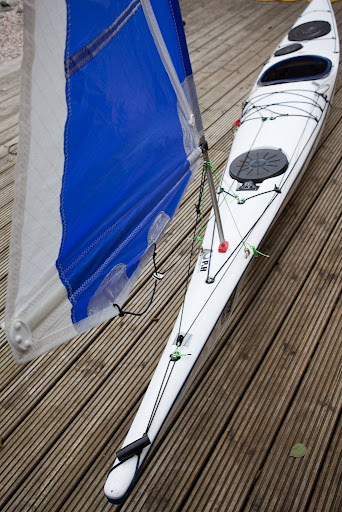
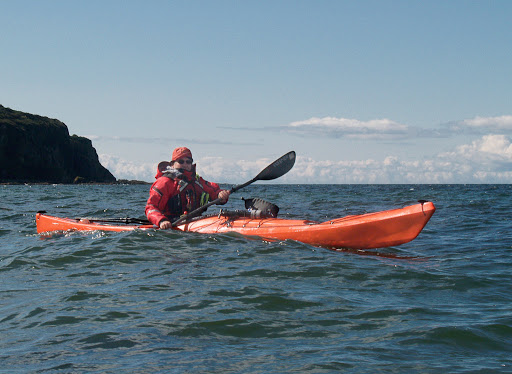
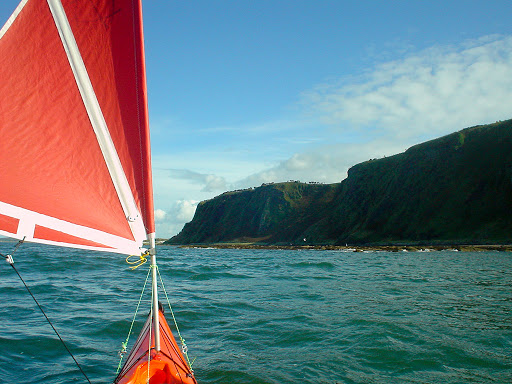
Flat Earth Kayak Sails add an exciting new dimension to sea kayaking. A major UK sea kayaking manufacturer/retailer is currently negotiating to distribute these Australian made rigs in Europe. Currently there are five rigs in Scotland and all who have tried them have been impressed. A large consignment is on its way to Scotland in time for the International Paddle Sport Trade Showin Germany in October. As it is likely that many others will be keen to try these sails, I have recorded my experience of fitting them to a Valley Nordkapp LV and a P&H Quest LV.
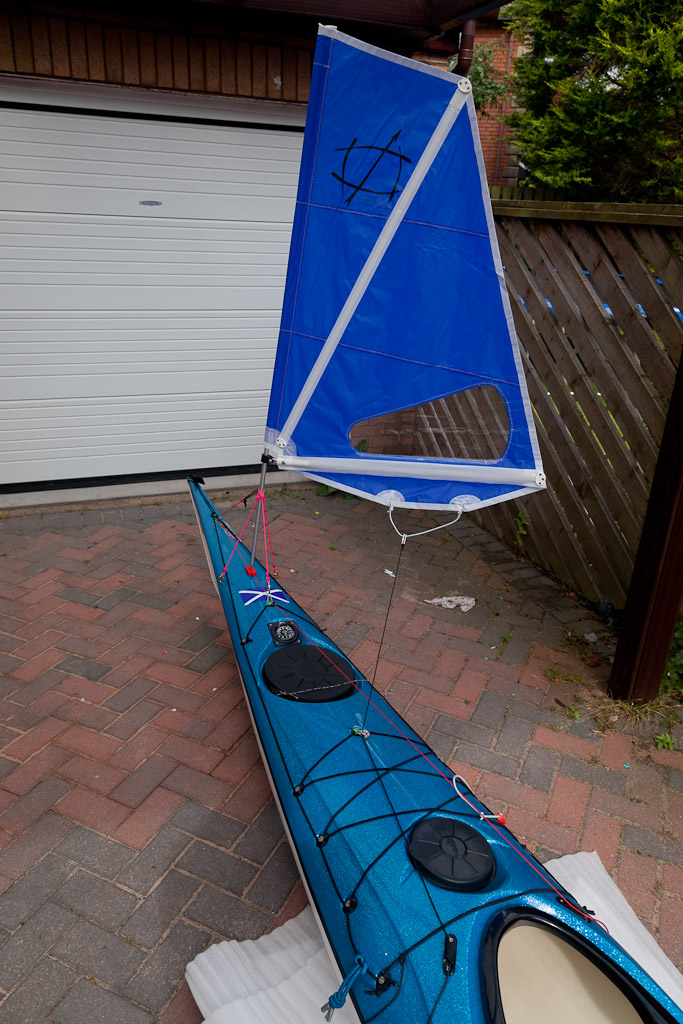
Valley Nordkapp LV
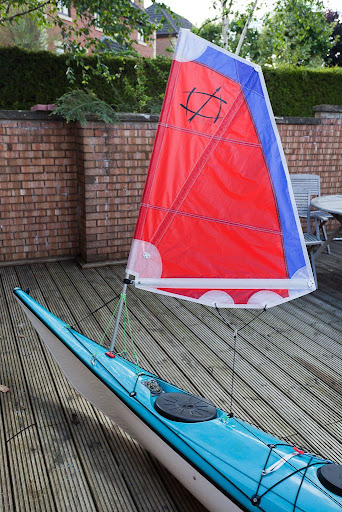
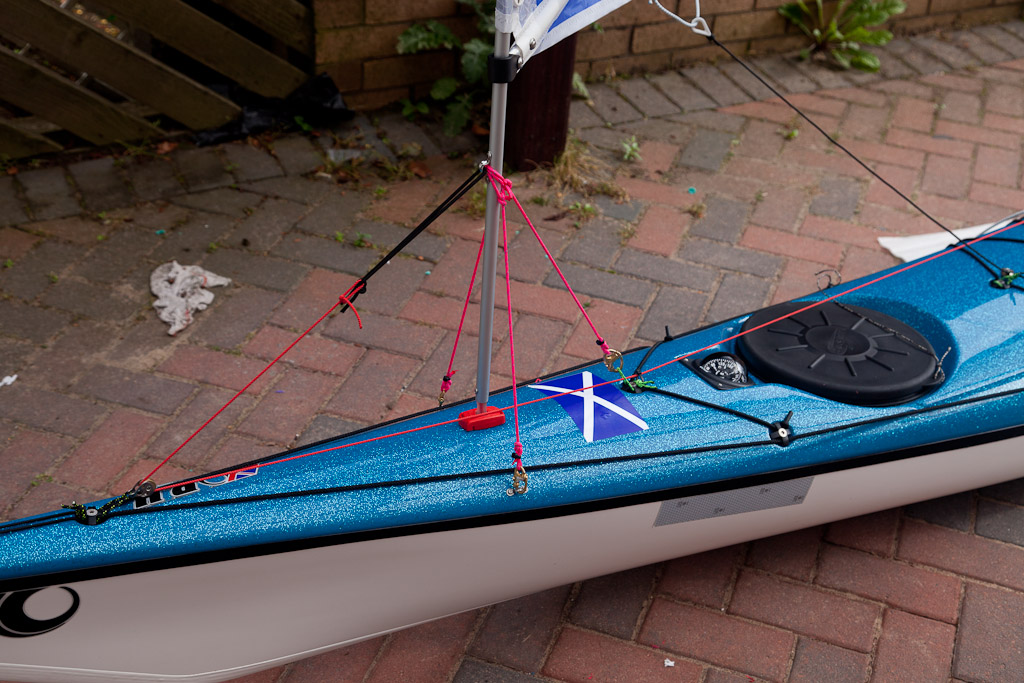
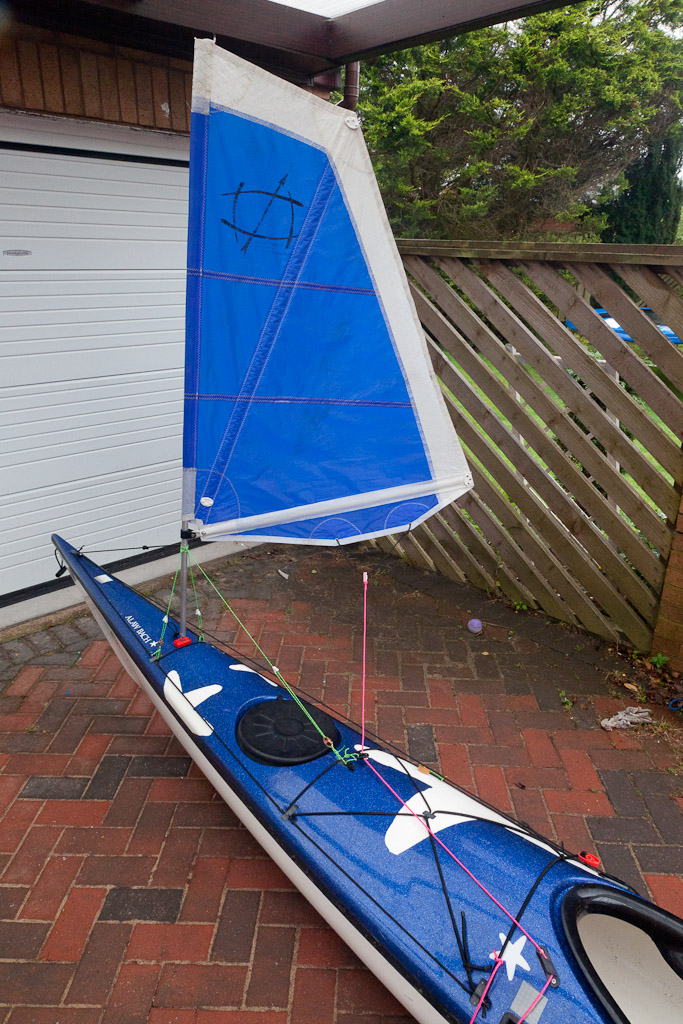
Mick MacRobb of Flat Earth Kayak Sails has some excellent video guides on his website and suggests you try and fit the mast about 175cm in front of the lowest part of your seat (where the bones in your bottom sit). The good news is that this is just a guide and it does not really matter where you fit the sail as long as it is somewhere near the front! On my Nordkapp LV 175cm in front of the seat low point lies between the compass and the front hatch which is not practical. I chose 190 cm in front of the seat which is just in front of the compass. For reference, this is 100cm behind the tip of the bow.
The sail is controlled by only two lines. The uphaul/forestay runs from the front of the mast below the sail to a pulley tied onto the front deck line fitting then back to a cleat at the right side of the cockpit. The sheet runs from the middle of the sail bottom down to a pulley on the deck then back to a cleat mounted at the left side of the cockpit.
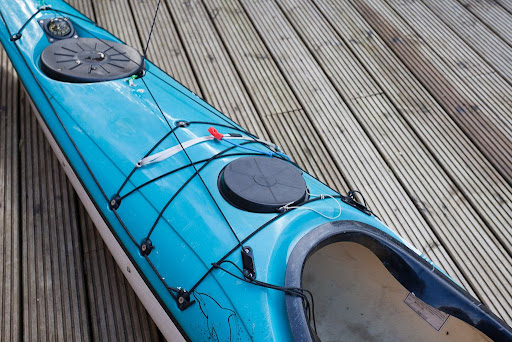
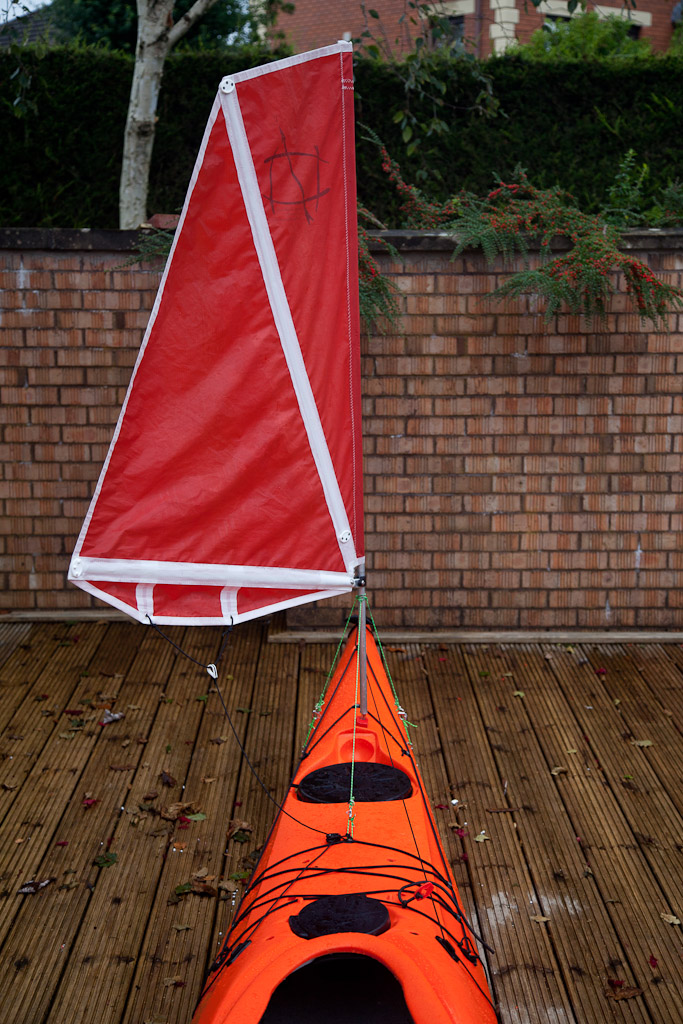
Before you do any drilling check that you can reach the top of the mast and ideally the (shorter) end of the boom batten from the cockpit, this is important to allow you to furl the sail. Obviously the overlap with the edge of the cockpit will be greater in a longer keyhole cockpit like this than in a shorter ocean cockpit.
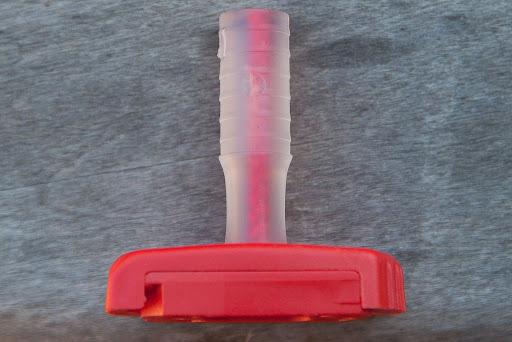
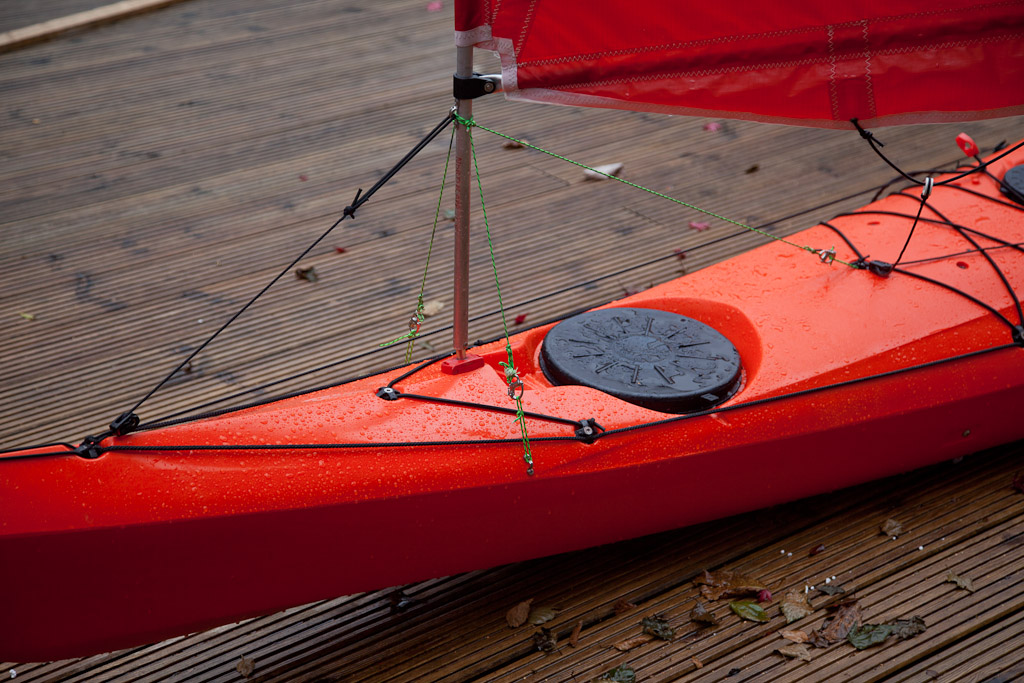
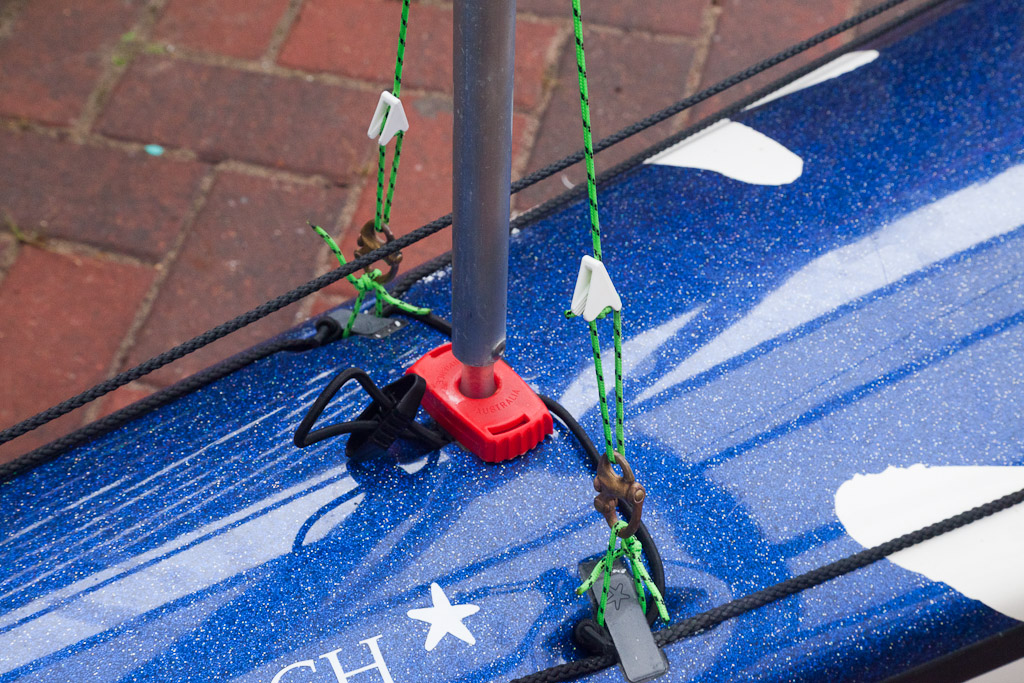
This close up shows the flexible polymer joint of the mast foot, which is permanently screwed into the base of the mast. It is attached to the upper of two plates, which twist together. the lower plate is permanently screwed to the deck of your kayak with two bolts.

I checked the mid line of the kayak with a thread tied between the bow and stern. Stick some tape on to protect the gel coat. The bolts need large penny washers inside the hull to spread the load, so you need to check they will fit inside next to any deck recesses.
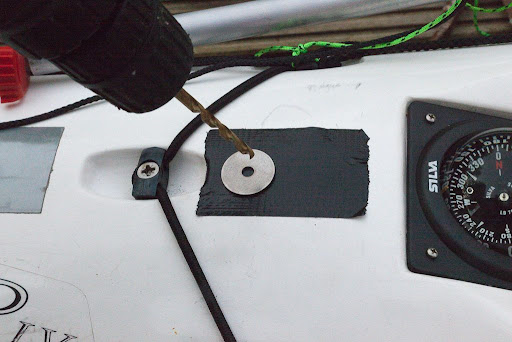
Before you drill, have a little think, are you in the right place?
I use a light pressure and a high speed which does little damage to the gel coat at the edge of the hole. Screw the first bolt in and start the second hole by drilling through the deck plate hole.
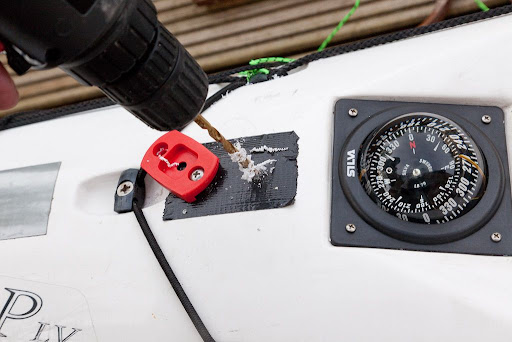
Move the deck plate to the side then finish off drilling the hole. It will be in exactly the right place!
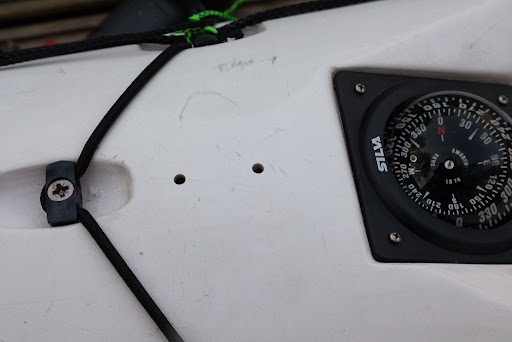
Remove the tape revealing two perfect, neat holes. Clean the area with acetone (available from a pharmacy store).
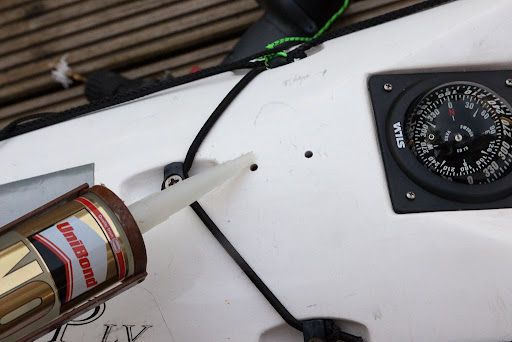
For sealant I never use silicone. I use a waterproof adhesive such as “No more nails” which is just as good as Sikaflex but a lot cheaper.
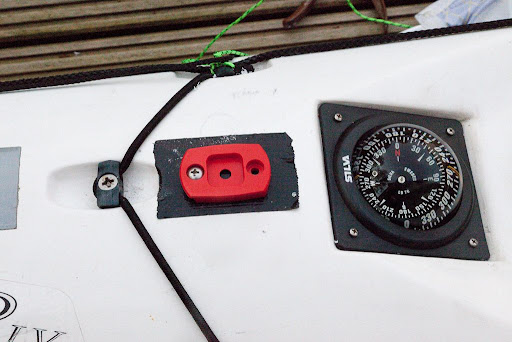
Then bolt the deck plate in place.
I cut the bolts to the right length before hand, remember to screw a nut on before you cut so it reforms the thread when you unscrew it. You should make sure you use nyloc nuts rather than plain nuts and spread the load with penny washers. You might get away with not cutting the bolts. We have found that M4 bolts with 12mm long threaded sections (and appropriate nyloc nuts and penny washers) are the ideal length for 3 British composite sea kayaks’ decks. This saves having to cut a stainless screw with a hacksaw which is never easy.
On the Nordkapp LV I was lucky that there were already deck fittings (RDF) on either side of the mast foot to attach the side stays (shrouds). On narrow bowed British style kayaks it is best to have the side stays at right angles (or just behind) to the mast and use a back stay. On a broad bowed kayak or sit on top you may get away with mounting the side stays well behind the mast foot and do away with the back stay. I fix the side stays to spectra cord loops through the RDF with 32mm snap shackles. The stays need to be “twang tight when the mast is vertical and it is best to adjust the stays by making a loop with a bowline. By trial and error, a bowline is easy to readjust to get the right length. I have not cut the line off at the knot but have looped some spare secured by a cable clip as I am using these rigs on a number of different kayaks.
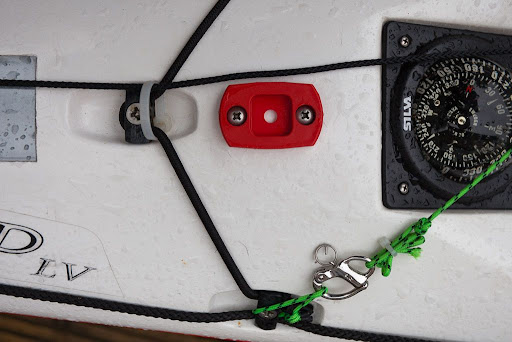
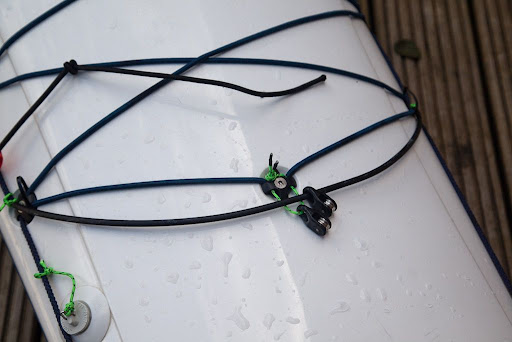
On the Nordkapp LV I originally tied the back stay to the front RDF of the deck elastics but I moved first it and then the sheet pulley…
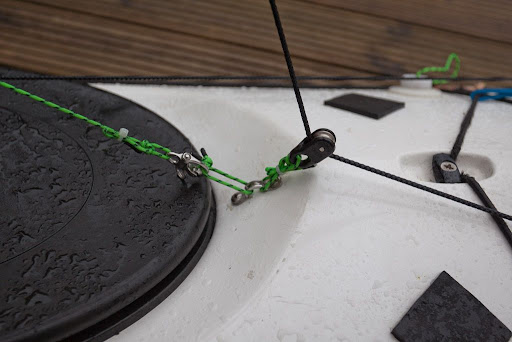
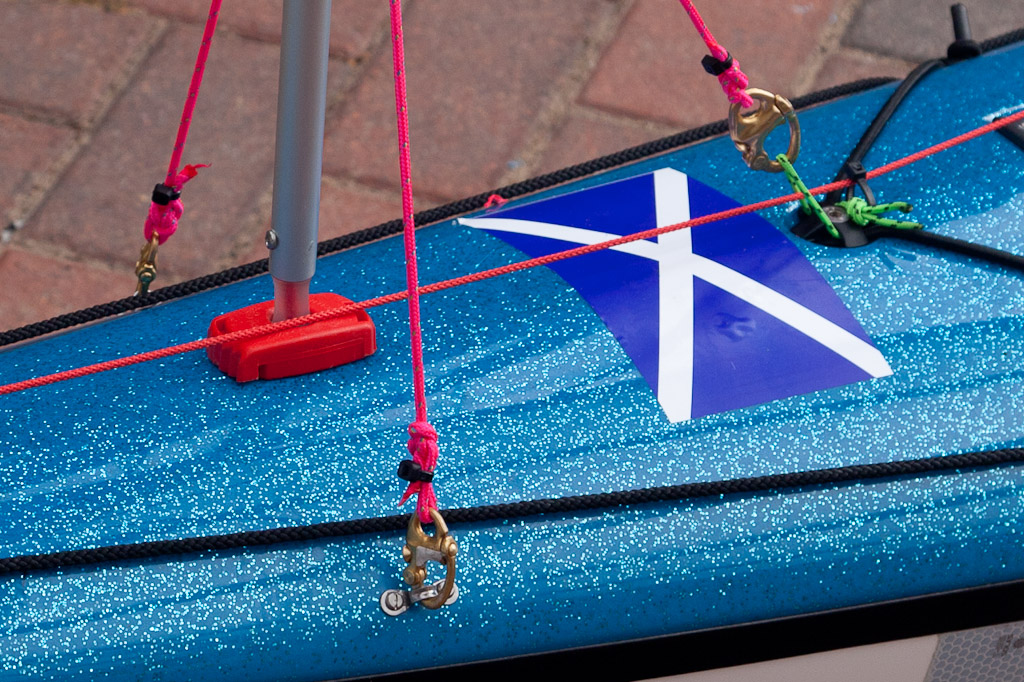
…forward to a deck clip I mounted just behind the front hatch. Flat Earth sails have no kicking strap to hold the boom down. It is important that the sheet (black) comes down to the pulley as steeply as possible so that the sail does not twist too much. In the photo above this one, you can see that the sheet is angled too far back and not holding the boom down enough. On the Nordkapp LV both the back stay (green) and the sheet pulley are attached to the same deck clip. On the Quest LV there is a central deck clip much more further forward to which the back stay can be attached. It is too far forward to mount the sheet pulley. To avoid drilling holes you could mount the sheet pulley to a rope strop tied between the deck lines. The sheet pulley …
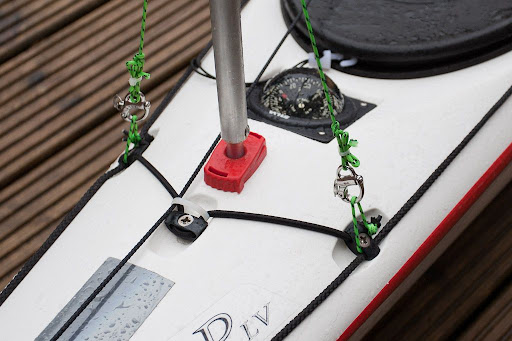
…and the uphaul/forestay pulley are both tied to the appropriate fitting with a small loop of spectra cord.
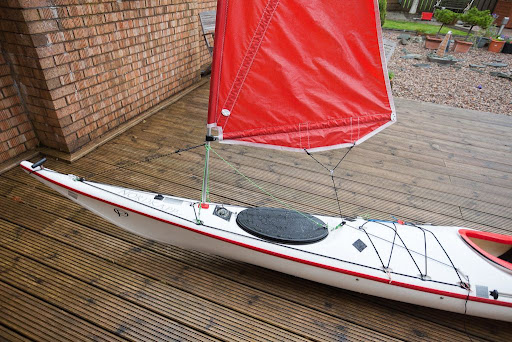
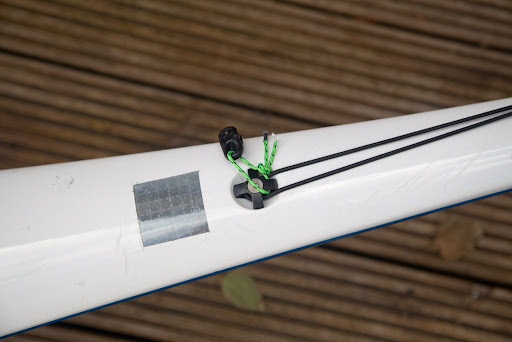
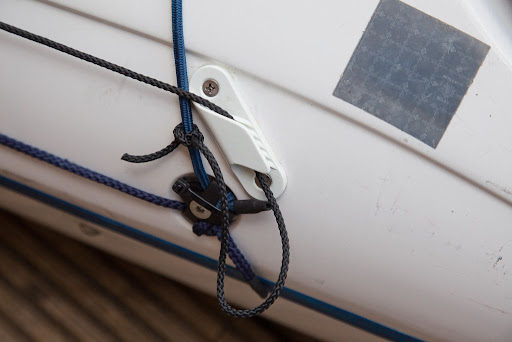
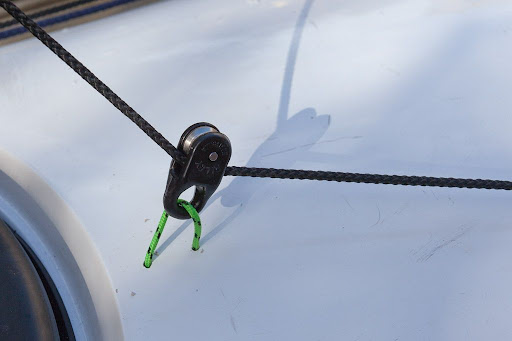
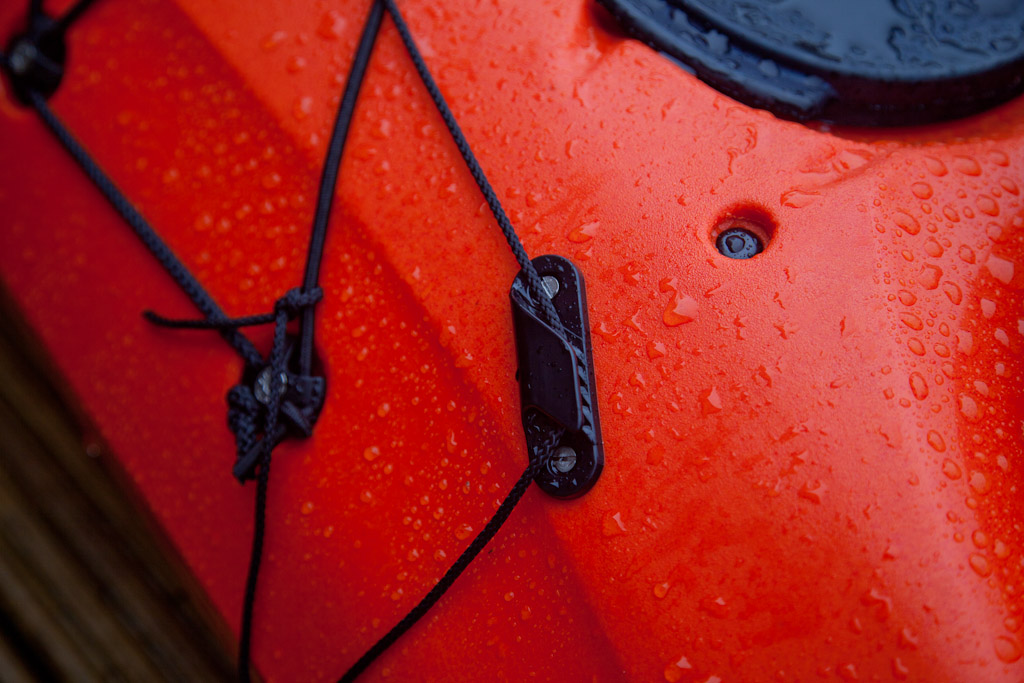
When folded and stowed on deck, the rig is secured by a short length of shock cord tied to the rear of the deck lines and secured by a plastic olive cleat…
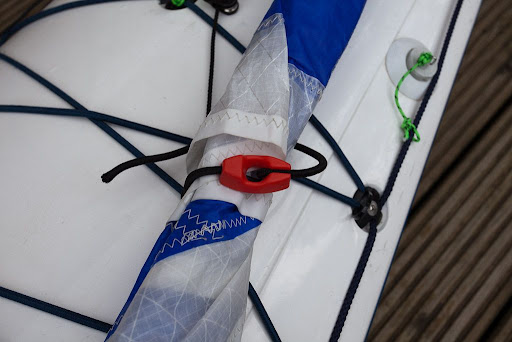
…like this.
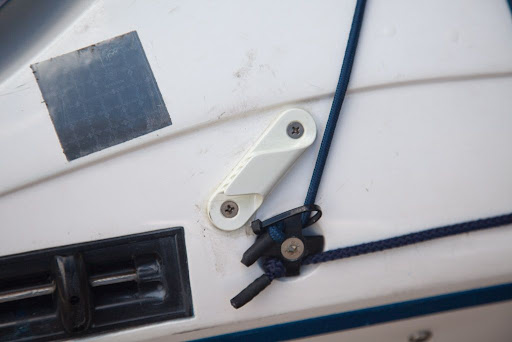
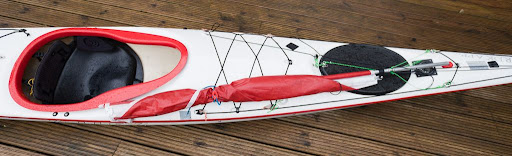
I like to keep a deck bag with a camera in the middle of the deck so I have chosen to mount the two clam cleats to the side of the deck just behind the front deck elastics. The cleats are mirror images of each other and I have mounted the open end towards the mid line so that a quick tug will release the line in a hurry. Before you mount the cleats here, make sure they clear your J bars for transporting the kayak on the roof rack.
The free ends of the uphaul/forestay and the sheet can be secured next to the cleat by a simple figure of eight knot round the adjacent deck elastic. Any loose line can be kept out of the way under the deck elastic.
If you have an uncluttered deck you might consider mounting the cleats in the mid line. In this case mount them with the open ends facing outward, again so a quick tug will release the line quickly.
As supplied you might think the sheet is too long. Don’t rush to cut it off. An important safety feature of the Flat Earth Rig is that the lack of kicking strap and sidestays mounted below the sail mean that if you are overpowered when running down wind, you can let the sheet go and the sail will weathercock round in front of the mast and depower, if the sheet is long enough!
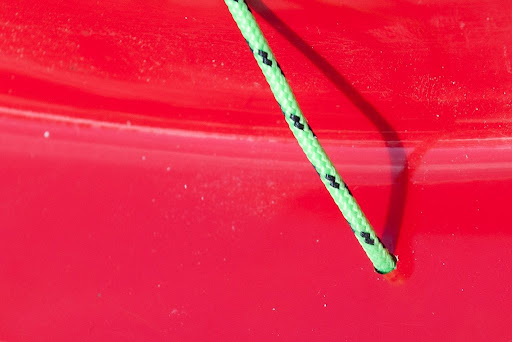
Because I mounted the uphaul/forestay cleat on the side of the cockpit, a straight line between the bow pulley and the cleat caused the line to sit in the groove on the outside of the Valley hatch cover. When I pulled the uphaul, it very neatly flipped the cover off! To get round this, I have routed the uphaul/forestay line through a mid line fairlead made by a heavy duty cable tie
looped round the deck elastics just behind the mid line RDF. You can see how this diverts the line over the middle of the hatch.

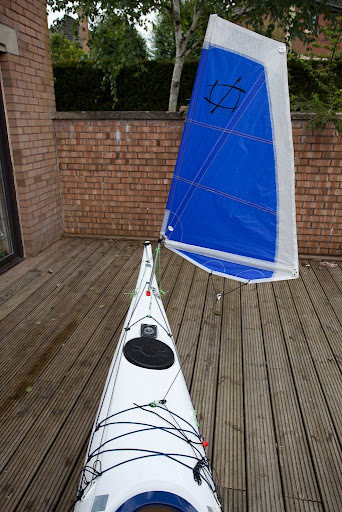
On the Quest LV, Mick’s ideal position of 175cm in front of the low point of the seat is the RDF in front of the compass. I found that if I mounted the mast base there, the stowed mast did not lie nicely along the deck like in the Nordkapp LV. It touched the deck in front of the cockpit then stuck up into the air behind the cockpit, where it would have hit my hand while paddling. I therefore fitted it at 208 cm in front of the seat low point ( 90 cm behind the bow). There were no lateral RDF fittings to mount the side stays to so I had to bolt two deck clips to the side of the deck. Mick recommends fitting them at right angles to the edge of the deck but because the bow was narrow I mounted them parallel so that the stays were as far apart as possible.
In this mast foot position the Quest LV sails perfectly and is very easy to steer to the wind using very small adjustments of the skeg. However I am only 5’8″ and I find reaching the sail to furl it a bit more awkward than in the Nordkap LV. In retrospect I might mount a Quest LV mast foot 198cm in front of the seat low point. The end of the stowed mast would stick up a little but not too much to impede paddling.
Whatever, the thing to remember about choosing a mast foot position is that there is a wide latitude of variation in which your kayak will sail well and the most important thing is to choose a position that keeps the folded rig out of the way, is easy to reach for folding away and uses as many existing RDFs as possible.
Finally, if you don’t have a suitable central RDF to mount the sheet pulley, you could make up a strop from cord (in this case stiffened with a plastic tube) tied to the deck lines on either side. Personally I preferred sailing with a pulley mounted close to the deck and I think I would prefer just to drill holes for another deck fitting and tie the sheet pulley to that.
I you do choose to fit a Flat Earth Kayak Sail I can guarantee you will have a heap of fun, we have literally been blown away by them!
Gnarlydog has also prepared an excellent guide to fitting sails of a variety of types which I read (and you should read) before installation.
P&H Quest.

This time we have mounted the mast foot 10 cm further back than on the Quest LV above. The centre of the mast foot is 100cm behind the bow and 198cm in front of the low point of the seat. We experimented with a tri-stay set up, with the two side stays behind the mast and doing away with the back stay. This worked fine when the wind was behind but one of the beauties of Mick’s rig is it allows beam and even close reaching. We found that when the sail was sheeted in, in the reaching position, it pulled the mast slightly back against the tension in the uphaul/fore stay elastic. This slackened off the rear set side stays and allowed the rig to lean over to leeward. For this reason we prefer to mount the two side stays at 90 degrees to the mast and to use a back stay.
We used an extra deck fitting, just behind the front hatch to fasten the block for the sheet. David decided to mount his cleats a little more inboard than I have on the two kayaks above. Note the angle of the cleat with respect to the sheet.
Another completed rig! Note the steep angle of the sheet compared to the bottom of the sail. If we saved drilling another set of holes and had mounted the sheet pulley further back, on the existing RDF, it would have pulled the sail back more and not down enough.
The little snap shackles we use are rather expensive at nearly £12 each or £36 for three. A cheap alternative has been suggested by my friend Geoff, which still allows quick assembly but uses a knot called a truckers hitch.
Tie a small loop about 2/3 down the stay. take the free end of the stay and thread it through the attachment point in the deck, now put the free end through the loop and pull it tight while you hold the mast upright. Now tie a couple of half hitches round the stay below the loop to secure.
Happy kayak sailing to David!
P&H Quest LV.
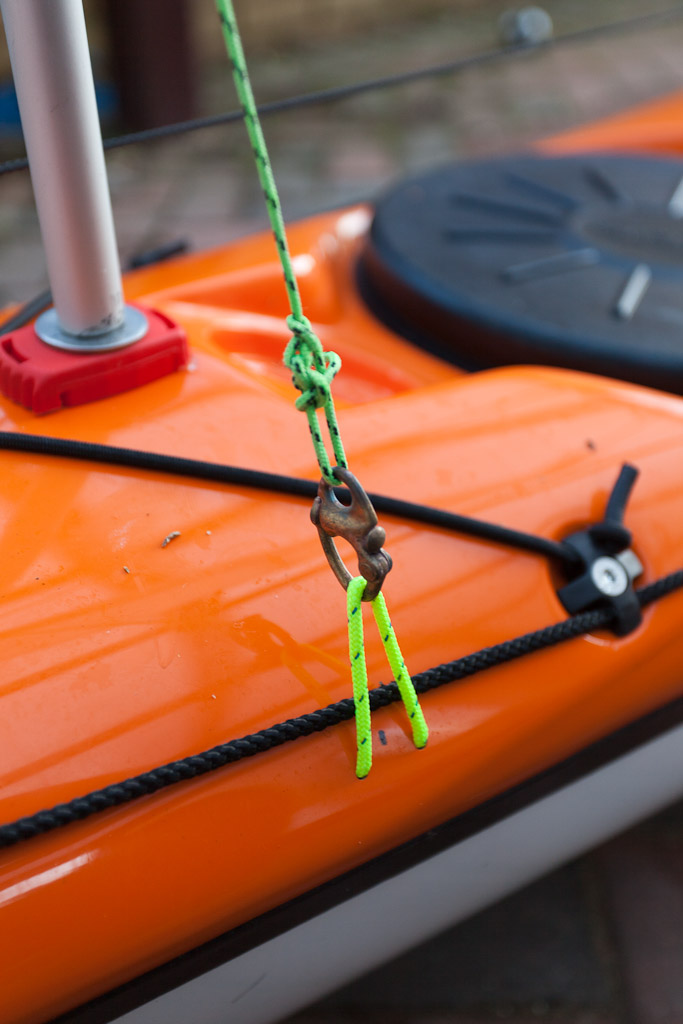
On the Quest LV, I had used one of the existing RDFs (at the front of the deck elastics) to mount the boom pulley. I found this allowed too much twist in the sail and decided to move the pulley mount forward so that it was more beneath the sheet attachment on the sail. One thing that has been a sight worry about fitting a sail is the potential the stainless steel deck fittings have for damage in a T rescue situation if sliding an upturned hull over a rescuer’s deck.
I decided to experiment with a softer solution which consists of simply a loop of 2.5mm spectra cord threaded through holes drilled in the deck.
This is a 3mm hole and it was quite easy to get the 2.5mm spectra cord through. A 2.5mm hole is a fiddle and I do not think it would be possible from inside, at arm’s length through a hatch! Spectra cord tends to unravel, I found cutting it at an angle with a very hot scalpel blade left a fine tapered but sealed end which could be fiddled through a 2.5mm hole.
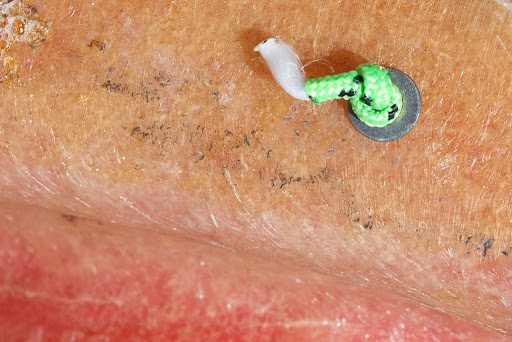
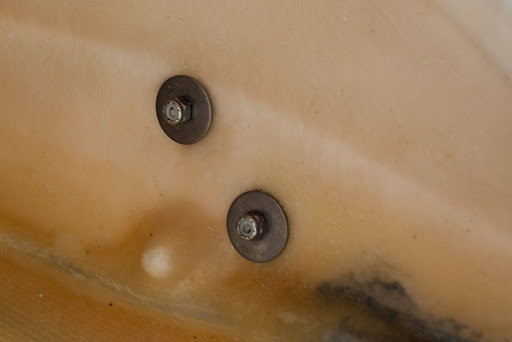
On the inside, I used a small stainless washer, tied a not in the cord then…
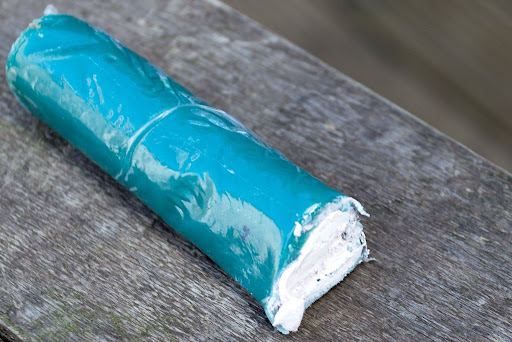
…cut off a slice of two part epoxy putty and kneaded it till it was mixed then plastered it over the knot and washer to seal and strengthen the loop of cord and the hole.
It may or not work. I will see how the boom fitting stands up to use before replacing the two side stay deck fittings. I might thread both ends through from inside and tie a knot in the external loose ends to make a loop.
P&H Cetus
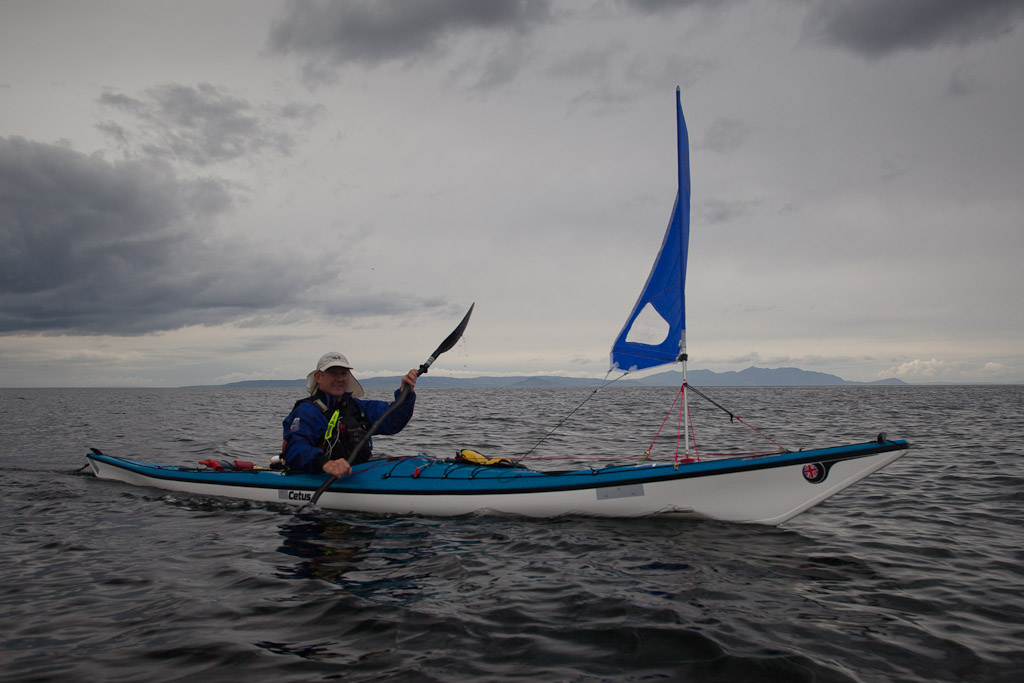
It works!
P&H Cetus MV

The uphaul/forestay, back stay, and sheet are mounted on existing RDFs. Low profile Clamcleat CL213/CL214 cleats are mounted forward of the cockpit to secure the uphaul and the sheet.
P&H Delphin.
I mounted the pulley for the uphaul/fore stay on the front deck line recessed deck fitting (RDF). The pulley for the sheet and the back stay went on the front deck elastic RDF. The existing side deck line RDFs were just too far behind the mast to provide support when reaching or beating so I mounted two stainless steel saddles on either side of the mast and attached the side stays to them. If you were only interested in downwind sailing you could use the RDFs and do away with the back stay.
I mounted the sheet and uphaul cleats in front of the cockpit and to either side of the 4th hatch.

The ideal position for the mast base was just forward of the compass mount but the foredeck on the Delphin is peaked. Purists will be horrified but I just fitted the mast base to the right of the mid line on the flat part of the deck secured with two penny washers to spread the load below deck.
I use the same mast on my Nordkapp LV, which does not have a peaked deck. The side stays were therefore too short, so using bowlines, I adjusted loops of 2mm Dyneema cord through the saddles and clipped the snap shackles into them. If you only use the sail on one kayak you could clip the snap shackles directly through the saddles.
The beauty of the Flat Earth flexible tendon universal joint is that the mast is still vertical despite the mount and…
…the wind couldn’t tell the difference!
Rockpool Alaw Bach
Not all Rockpool Alaw Bachs have a skeg fitted but mine already had one. I find a skeg is a great help to ease of sailing a variety of courses, without having to apply a lot of corrective strokes or edging.
I chose to mount the deck plate for the mast foot right on top of the forward mid line deck elastic mount. Mouldings in the deck increase the stiffness and make an ideal place to mount the mast foot. By chance the deck line RDF mounts are ideally situated at right angles to the mast base to secure the side stays.
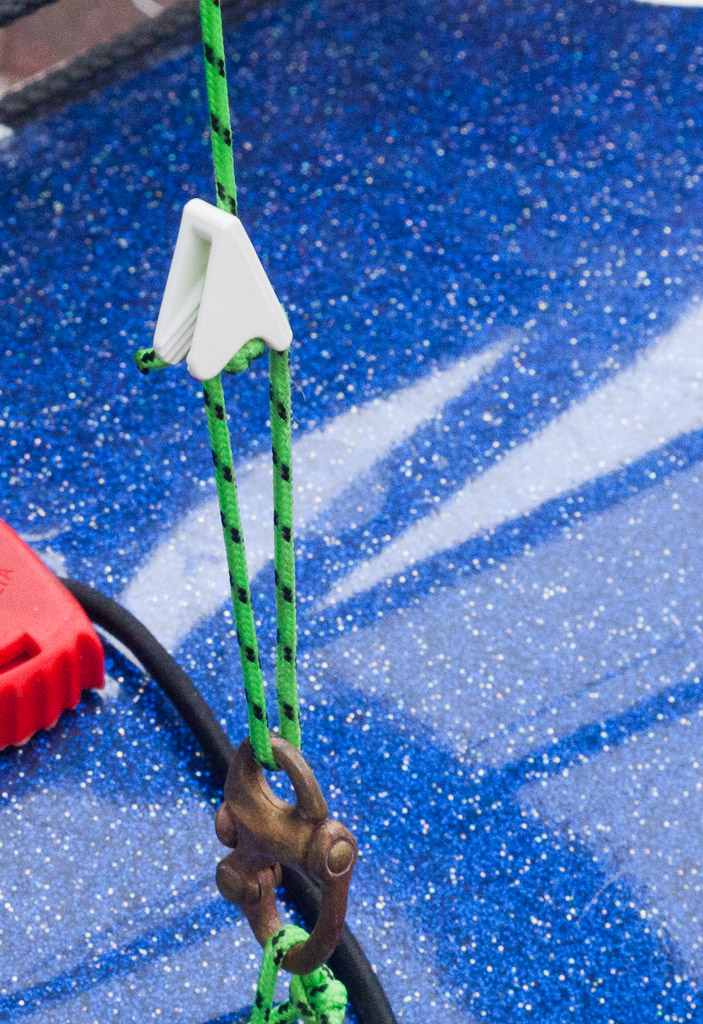
I like to use snap shackles for the side and back stays to make rigging quicker. Up until now I have only been using the sail on two kayaks but I now have sail mounts on 4 kayaks. To accommodate two kayaks with the same stays, I have just made the loops through the deck fittings different lengths on each kayak. However, with 4 different kayaks I needed a wider adjustment, especially with the back stay, so I have used Clamcleat Line-Loks CL266.
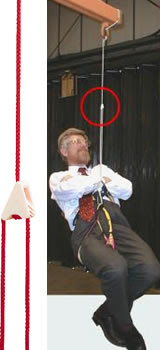
These little cleats seem quite strong, as evidenced by this publicity photo on the Clamcleat web site. They are much quicker and easier to adjust the side stays to twang tight than tying bowlines. If you only fit your sail to one kayak, it would be better to just spend time with bowlines.
NB. In practice, these cleats have been a disappointment. Although they have good grip on dry cord and in winds up to F4, they slip when the cord is wet in F4 and above conditions. Perhaps the bigger size might be more effective but I think if you need to fit your rig to different kayaks it would be safer to use trucker’s hitches.
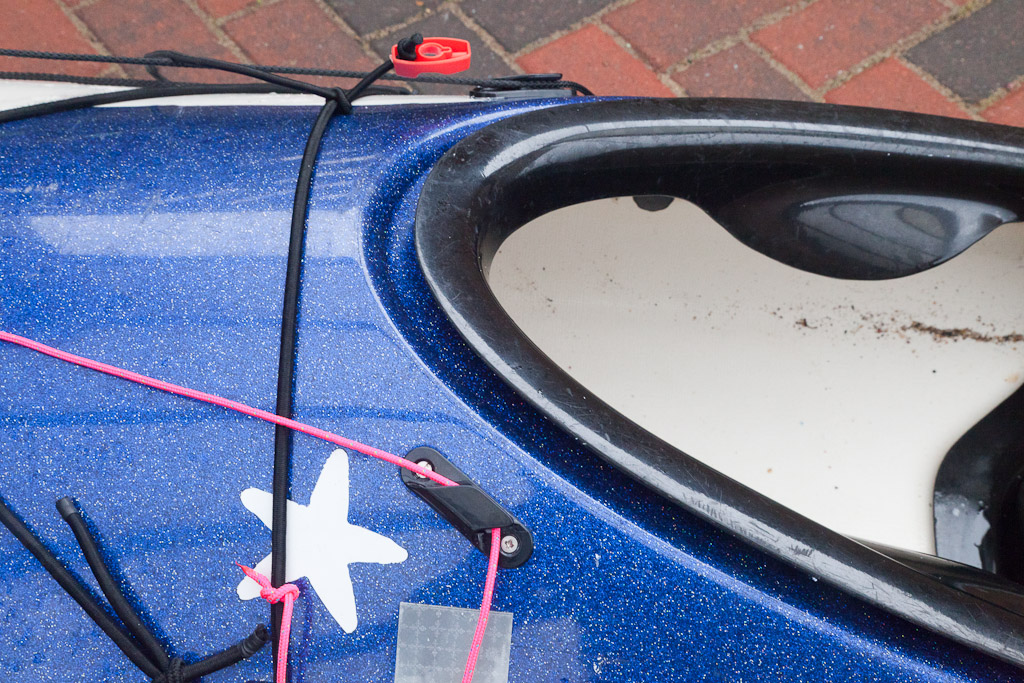
I mounted the cleats just outboard of the cockpit rim. Note that the Clamcleat CL213 starboard and CL 214 port cleats do not have fairleads so in an extreme gust just yank the sheet (pink) towards you and its away. This also works if you are underwater setting up for a roll! Note also, I have fitted the starboard version of the cleat to port and vice versa!
13 COMMENTS:
-

Douglas, that’s a very detailed and informative article on the FEKS set up. Nicely done.
I use FEKS with a slightly different style of stays set up.
My sail is not mounted as high (it has a shorter mast) and does have only two backstays/sidestays.
While I can’t bring the sail around to the bow completely when letting it out (depowering) the sails seems to make things less tippy since it’s mounted lower.
On the Nordkapp LV, I use the original centre deck fitting (in front of the compass recess) as base mounting spot for the mast but not the perimeter line fitting as sidestays (they are in the wrong spot, nor far back enough).
I like my sails to clear the cockpit completely when stowed on deck.
More details on my set up at: http://gnarlydognews.blogspot.com/2009/03/shop-diy-sea-kayak-sail.html -
 AnonymousJul 14, 2010 08:02 PM
D0uglas, its a well writen article, thers nothing I can add to I will be yousing it myself as a good explination on seting up sails, along with gnarlydogs blog as well, both are diferant and both work well
Mick Macrobb
flat earth sails -

Greetings Gnarly, I have linked to your excellent installation post thank you.
I noticed you were using shorter masts but equally I noticed that you have been sailing in 30 knot winds! Here in the west coast of Scotland we do not get steady trade winds and winds of that strength are very gusty due to their cyclonic origins and the mountains. The most I have used Flat Earth Kayak Sails in was a force 5 which was plenty exciting enough. Above that I would prefer to be windsurfing anyway!
In lighter winds I think the higher Flat Earth rig will have an advantage over a lower aspect rig.
Thanks Mick, good luck with your new European venture!
:o)
-
Hi Douglas do you know when and where will these sails be available in the UK and is it possible to get demo sails?
thanks Andy
-
Hello Andy, Geoff Turner from Kari-Tek already has a demo kayak set up based in Ayrshire.
-

My only concern with the cord going straight through the hole in the deck would be that it could chafe on the fairly sharp edge of the drilled hole. Perhaps sliding a piece of tube over it would be a good idea?
-
Tom, I had some tube and made a U under the two holes in the deck but it would have requires a huge blob of epoxy to cover it. I think that 4mm Dyneema will last plenty long enough!
-
AnonymousJul 30, 2010 03:27 AM
Tom, Iv had loops as mentiond on Boats for a cupal of years with no chafing, and when it needs replacing you just sand of the epoxy and re do the cord, On my own boat I have the side stay mounted into the deck like this , and ajust its length at the mast , its simpal and less fitings, the down side is its always ther , but I never have the sail of the kayak.
Mick
flat earth sails -
AnonymousMay 13, 2011 09:42 AM
Douglas, I’ve just purchased the flat earth sail from karitek and will be fitting to an original P&H Cetus (HV). I’m just looking for any recommendations on fitting to that specific boat, and wondered if you have any pointers/experience for that boat ? Don’t want to start drilling holes until I’m 100% sure !
Karitek also supply the fitting kit with a bulls eye each side of the mast for the side stays, which feedback to a further 2 cleats by the deck lines infront of the cockpit – the argument being that can tighten those side stays if some slack in higher winds causing mast to tilt. I note that you just tie/clip them off at the side at 90 degrees to the mast. Just wondered if you had any comments. Also the Karitek kit recommends the side stays position 80 cm behind the mast, with no back stay, and I wondered if you had tried that setup and had any comments.
Thankyou in advance ! Richard
-
Hello Richard, yes I have tried the Karitek arrangement and the original, Flat Earth, arrangement on two Quests, side by side, and I must say I do not like the Karitek arrangement at all.
It is far too complicated and it does not sail so well. First of all the Karitek way involves 4 cleats and lines coming back to the cockpit. The way I have rigged it, you only have two. The side stays are made of dyneema, which does not stretch so they should be “fit and forget” and don’t need adjustment. The little snap shackles I use mean you just need to adjust the length once.
The main reason I do not like the Karitek way is that if you attempt to sail upwind in a breeze the mast rakes aft loosening off both of the stays and the mast leans off to leeward. A Karitek rigged sail can’t point as high into the wind as the way I have shown.
The best way to determine the mastfoot positions is to make sure you can reach the boom from your normal sitting position, as you will need to secure it with an elastic loop when the sail is stowed.
If there are existing RDF deck line fittings near the mastfoot position you have chosen, I would probably move the mastfoot so it is between the two RDFs and put the side stays on to them.
If you need to drill holes for side stays, I have stopped using hard fittings. I drill a single hole and thread a piece of Dynaema through from inside with a washer and knot on the inside. I secure this with epoxy putty then tie a bowline on the end above deck. I attach the side/back stay snap shackle to that.
I hope you have a lot of fun with your sail!
Douglas :o)
-
AnonymousMay 13, 2011 01:27 PM
Many thanks Douglas 🙂
I think I understand. By having the side stays positioned rearward of the mast, I could see how when sailing upwind, that the mast could be pushed aft (although isn’t this restricted by the mast haul ?). I guess being at 90 degrees would minimise that effect.Will follow the suggestion on using dyneema through a hole and putty. Must admit I was concerned about the possible damage caused during rescues with the all the additional hardware on the deck.
You tried this on a Quest. Have you tried on a Cetus ?
Looking forward to trying the rig on the water. Can’t wait !
Richard -
Hi Richard the forestay/uphaul has elastic in it so if a gust hits when you are going upwind, or if you sheet in to go up wind, the mast tend to rake aft.
:o)
-
AnonymousMay 17, 2011 04:37 AM
Thanks Douglas. Some great technical advice on your blog, even for non-sailors like me.
I rigged the Cetus and tried for first time around the Forth bridges in a 4 gusting 5, at Springs peak flow, I found it quick to get the hang of and surprisingly stable. A lot of fun that’s for sure. Downwind was rapid, but tacking upwind with the stream against me was hard work & took a long time :-), close hauled – probably about 45 degrees to the wind. How close have you managed to get to the wind with your setup ?
I also found that fractional skeg control dictated the steering, although in a strong wind, when skeg was minimal, that there was some drift downwind making the tacking time consuming, but to be honest this could have been largely due to the tidal flow. Have you found that it tacks into wind well, even with no skeg, when tide is minimal ?
One other thing I noticed, was that in order to keep the mast vertical (as recommended in your blog) to prevent wind spilling from top of sail, that sometime I had to lean my body into wind (but not edging the boat).
Looking forward to my next foray, which will be round Mull in a couple of weeks (weather permitting !)
Best,
Richard